Installation
Prerequisites for Installation
To install DataIntell, you need the following minimum requirements:
- Processor: Quad core processor
- Memory: 32 GB Ram
- Storage: 2 TB SSD
- Connection: 10GB Ethernet Connection
- Operating system: Centos 7
Installation
Download and Install package
Download and install the package with the link provided to you. Replace {link} in the following command with your link.
Commands:
curl https://dataintell-bucket.s3.ca-central-1.amazonaws.com/install/output/centos-standard-install.tar.gz >> install.tar
tar -xvf install.tar
cd output/install_folder
chmod 755 install.sh
./install.sh | tee output.txt
Configure ElasticSearch Database
Data configuration
Make sure your Centos partition has enough storage space for the ElasticSearch
data path /var/lib/elasticsearch/
To show partitions, run the following command:
df -h
If your / parition is to small, you can move data to
/home by creating a new folder and moving the data
mkdir /home/elasticsearch
cp -r /var/lib/elasticsearch /home/elasticsearch
chown -R elasticsearch:elasticsearch /home/elasticsearch
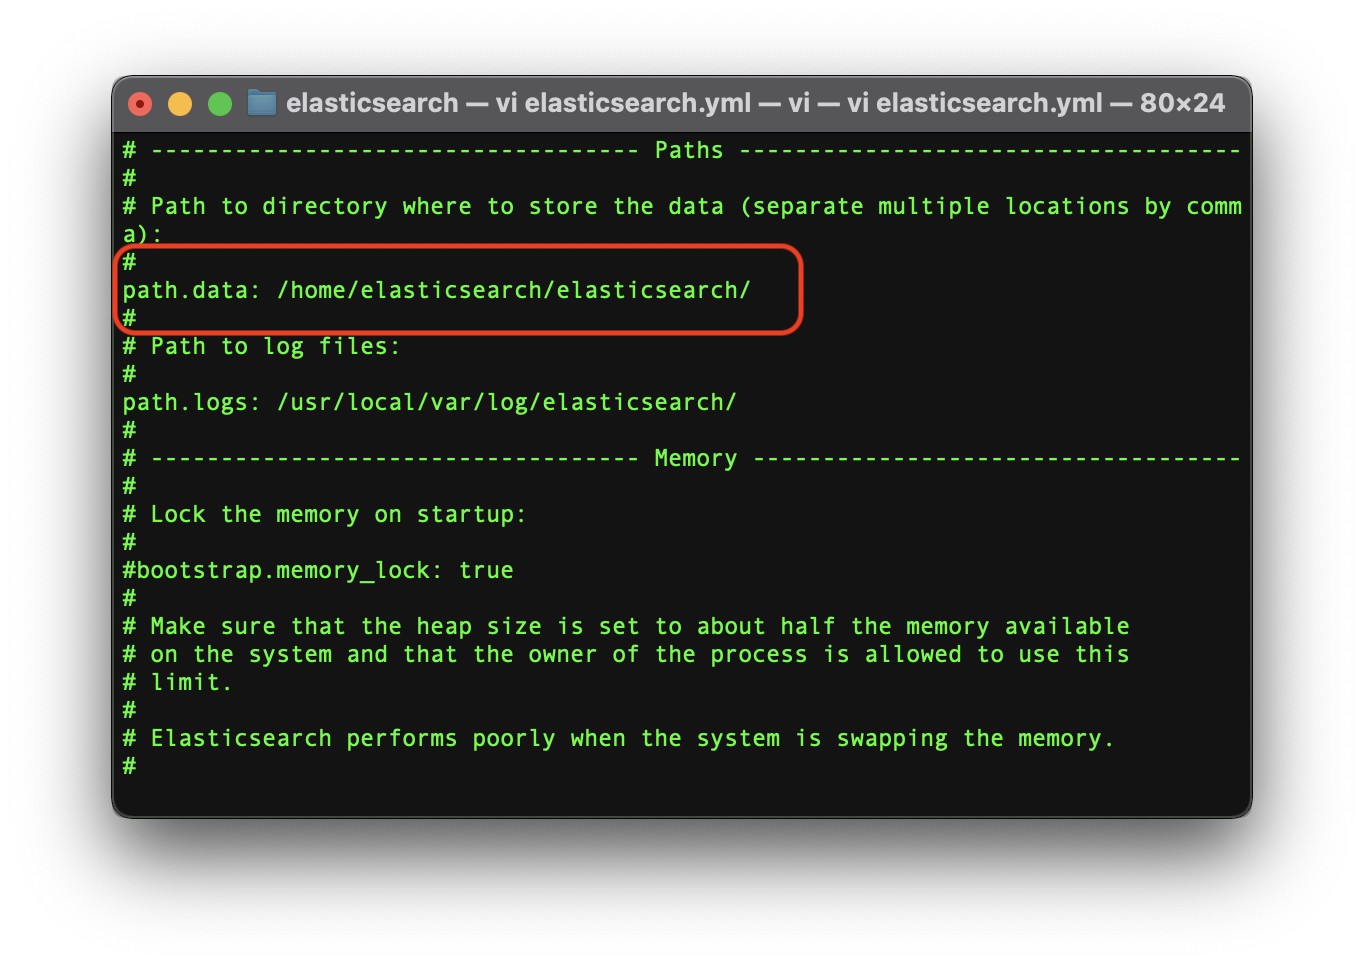
Once the data is relocated, you just need to change the value of
path.data in the configuration file
elasticsearch.yml.
vi /etc/elasticsearch/elasticsearch.yml
Example: If you moved the data to /home/elasticsearch, your
elasticsearch.yml file should look like this.
Restart Elasticsearch
Finally, once all the Elasticsearch configuration are changed, you need to restart the ElasticSearch service with the following command:
systemctl restart elasticsearch
Activate License
Finally, you need to activate license to start using DataIntell.
Open a Web Browser and go to the ip address of the server.
Example: If your server is running on the IP 10.10.0.98, the address should be http://10.10.0.98
You should see the login page of DataIntell and you can login with the default user admin and the default password password
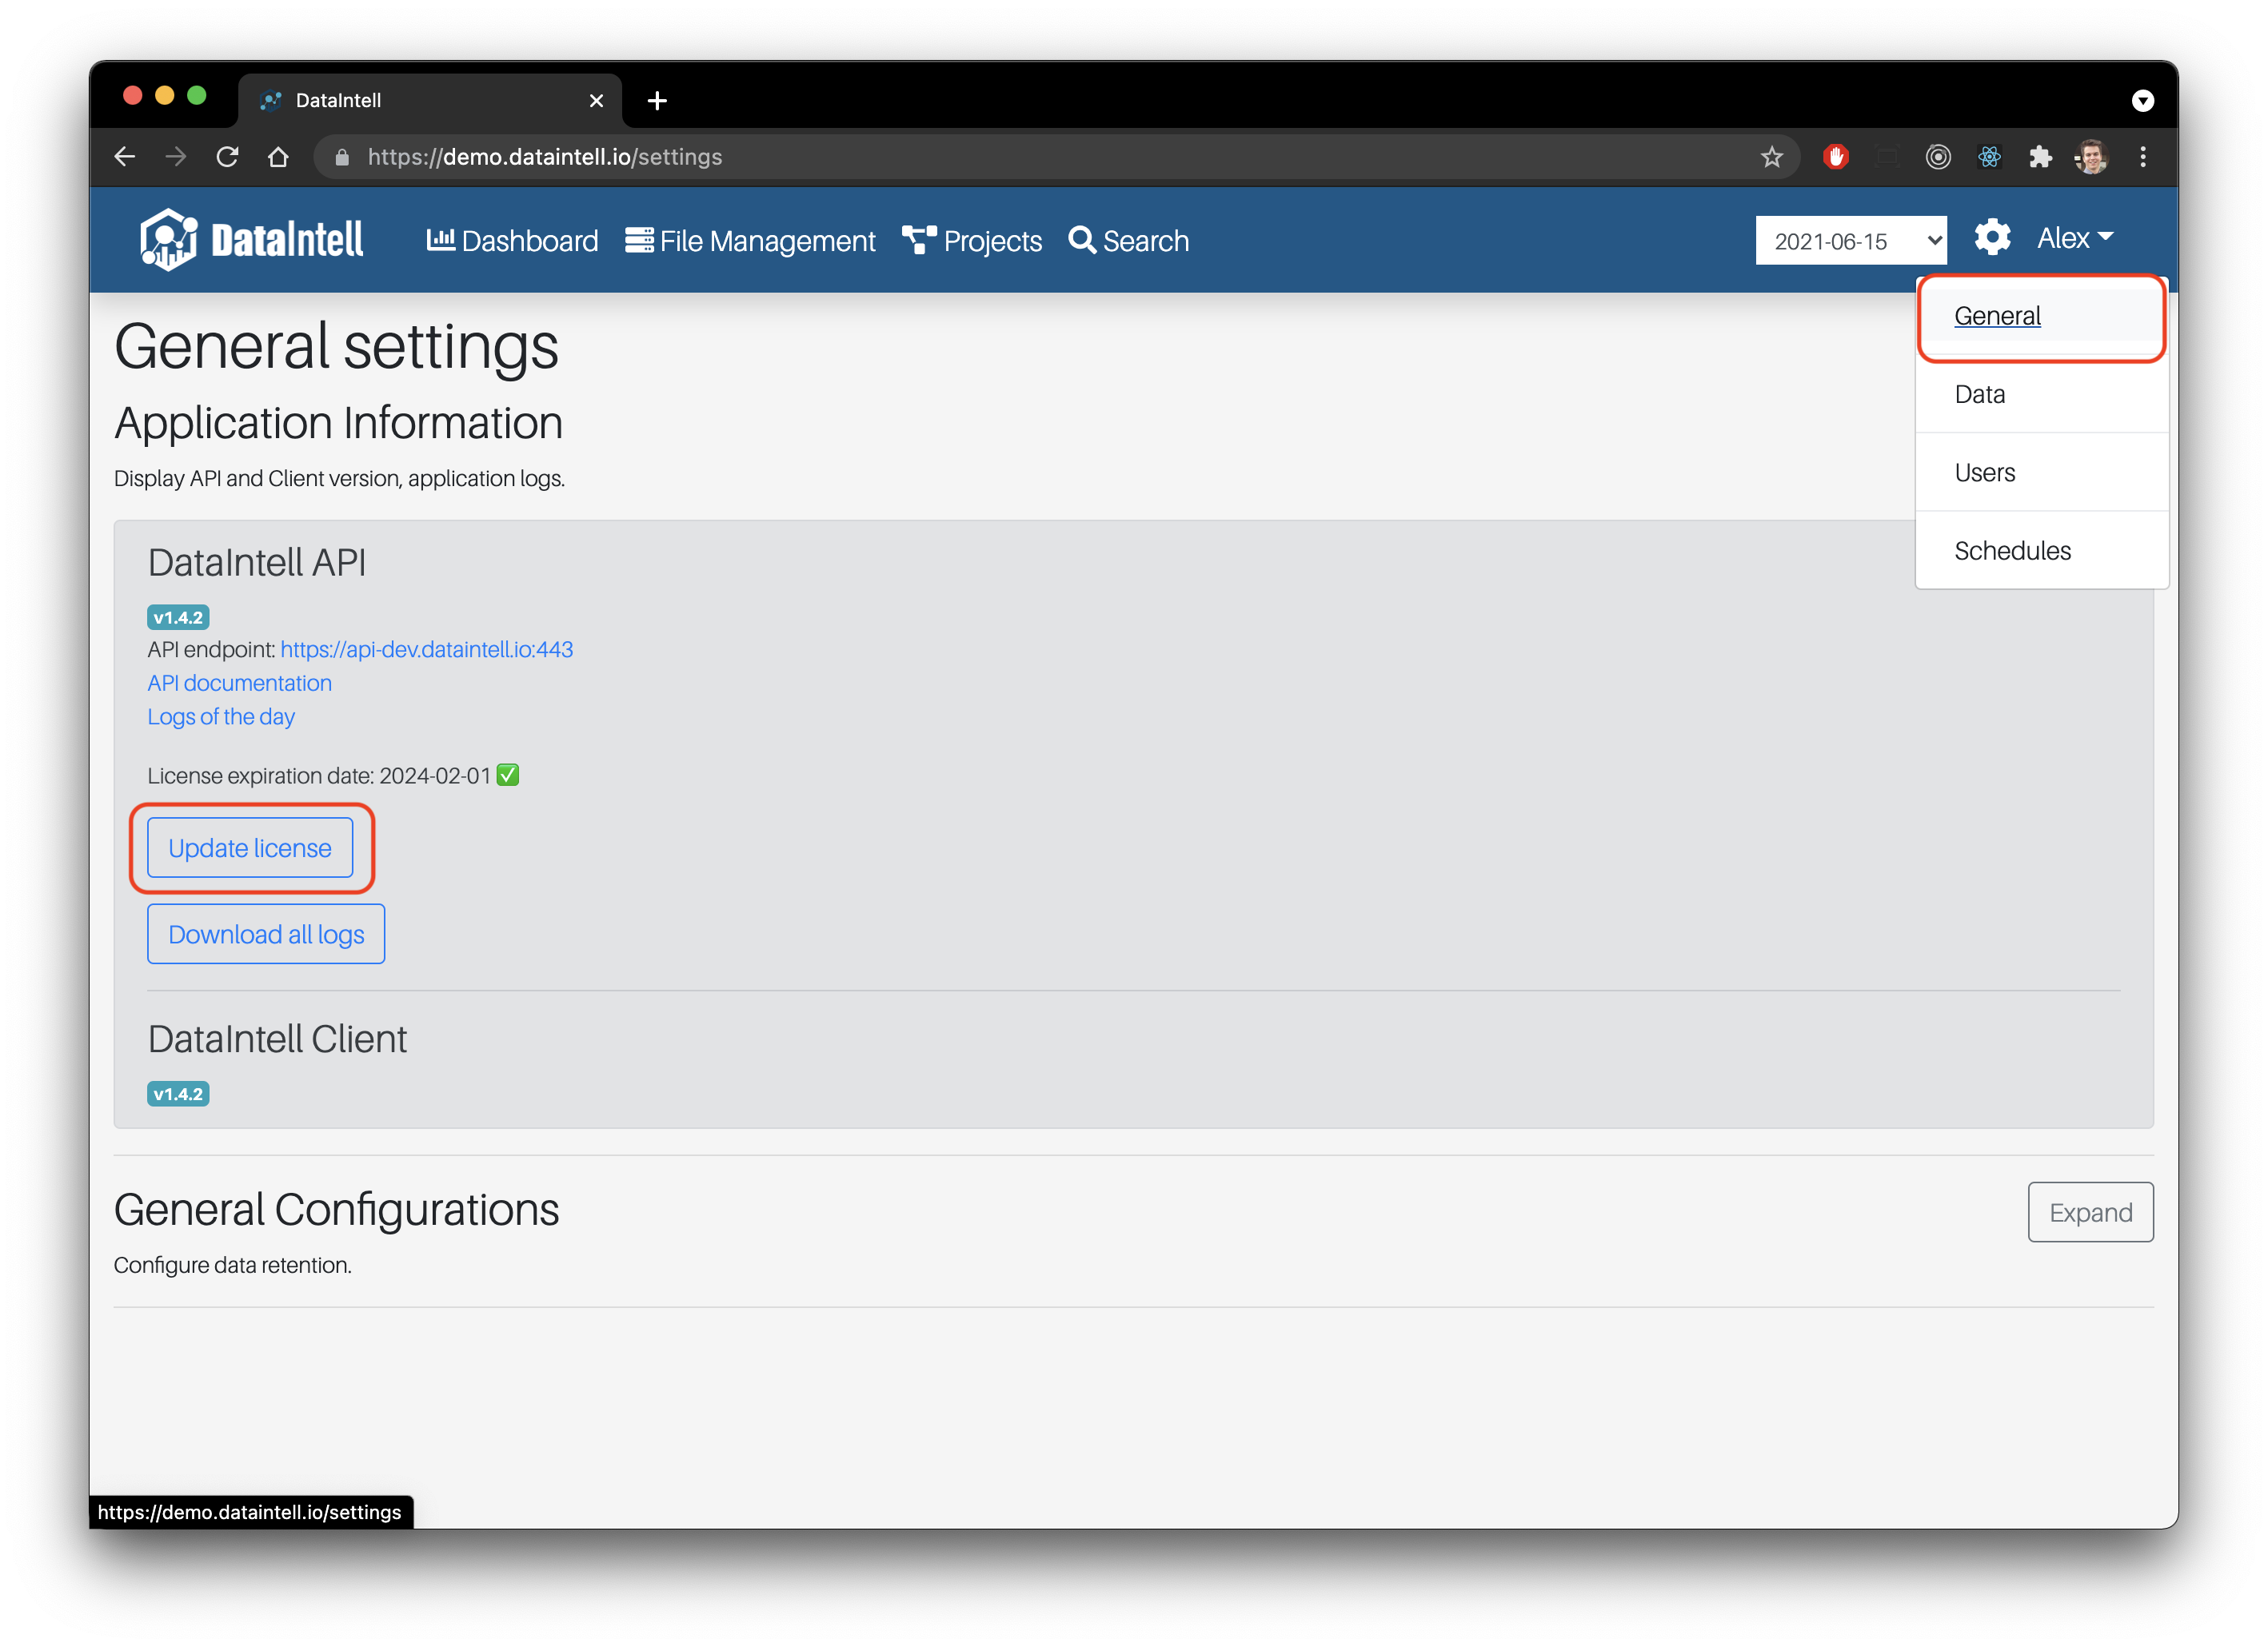
Go in the General section of the settings and click on the Update license button. Just copy the content of the license you were provided with.
Configure and Scan volumes
To scan a volume, you need to mount the volume on the Centos server.
In the application, go in the Settings in the Data section.
Add a volume with a name and a path, a server and a storage price
- Name: The name that will be in the DataIntell application
- Path: The mount point on your server. Ex: /mnt/Nas
- Server: Keep the default one if it's only running on one server.
- Storage Price: This is used to calculate the price of a project. It can be changed anytime.

To launch a scan, just click on the Scan all volumes button.
It could take up to 5 minutes to see data in the Search section. You can track the progress of the scan in the Dashboard section.
Update existing install
On your installation server, open a terminal and run the following commands as root:
Don't forget to replace the {version} to something like 1.4.3
curl https://dataintell-bucket.s3.ca-central-1.amazonaws.com/updates/output/update-{version}.tar.gz >> update.tar.gz
tar -xvf update.tar.gz
cd output/update-{version}
chmod 755 update-api.sh update-client.sh update-elasticsearch.sh
./update-api.sh
./update-client.sh
./update-elasticsearch.sh
Update existing install on docker
API
On your installation server, open a terminal and run the following commands as root:
Note: Don't forget to replace the {version} to something like 1.4.3
First make sure the application is running
docker ps
Authenticate with AWS ECR service
aws ecr get-login-password --region ca-central-1 | docker login --username AWS --password-stdin 827631532322.dkr.ecr.ca-central-1.amazonaws.com
Get the latest version.
docker pull 827631532322.dkr.ecr.ca-central-1.amazonaws.com/dataintell-api:{version}
Stop and start the API with the lastest version.
docker stop dataintell-api
docker rm dataintell-api
docker run -d --restart unless-stopped --env-file /dataintell/config-map.env -p 8085:8085 --name dataintell-api 827631532322.dkr.ecr.ca-central-1.amazonaws.com/dataintell-api:{version}
Note: The file config-map.env could be located in another location then /dataintell/
Client
On your installation server, open a terminal and run the following commands as root:
Note: Don't forget to replace the {version} to something like 1.4.3
First make sure the application is running
docker ps
Authenticate with AWS ECR service
aws ecr get-login-password --region ca-central-1 | docker login --username AWS --password-stdin 827631532322.dkr.ecr.ca-central-1.amazonaws.com
Get the latest version.
docker pull 827631532322.dkr.ecr.ca-central-1.amazonaws.com/dataintell-client:{version}
Extract current configuration of the running application and list them
DOCKER_ARG_1=$(docker inspect --format='{{.Config.Env}}' dataintell-client | cut -d' ' -f1 | sed 's/\[//')
DOCKER_ARG_1=$(docker inspect --format='{{.Config.Env}}' dataintell-client | cut -d' ' -f1 | sed 's/\[//')
PORT=$(docker port dataintell-client 5000)
echo "DOCKER_ARG_1:" $DOCKER_ARG_1
echo "DOCKER_ARG_2:" $DOCKER_ARG_2
echo "PORT:" $PORT
If in the previous command you saw, REACT_APP_APIURL and REACT_APP_APIPORT you can stop and start the API with the lastest version with the following commands.
If in the previous command you didn't see, REACT_APP_APIURL and REACT_APP_APIPORT, refer to the note at the end of the section.
docker stop dataintell-client
docker rm dataintell-client
docker run -d --restart unless-stopped -p $PORT:5000 -e $DOCKER_ARG_1 -e $DOCKER_ARG_2 --name dataintell-client 827631532322.dkr.ecr.ca-central-1.amazonaws.com/dataintell-client:{version}
Note: Here are the value to replace in the last command if the application did not start properly:
- $PORT: The expose port Ex: 80
- $DOCKER_ARG_1: The API URL Ex: REACT_APP_APIURL="http://10.10.50.10"
- $DOCKER_ARG_1: The API PORT Ex: REACT_APP_APIURL=8085